It's been sunny all week here in Edinburgh and I couldn't resign myself to stay inside. I had to go out and enjoy lazying about in the park with a book and have a chat with friends :-)
And to be honest I also kept on postponing bying frames...
Anyway the serie is now ready. And I am sharing with you how I realised it.
I already had selected the patterned papers I wanted to use as background (see previous post Bird serie - 1).
I chose plain coloured cardboard matching the background papers and I cut the bird template in it. I then decorated each bird with various embellishments (flowers, buttons, paper lace doilies), I highlighted the border with a pen and I used a flat pearl bead for the eye).
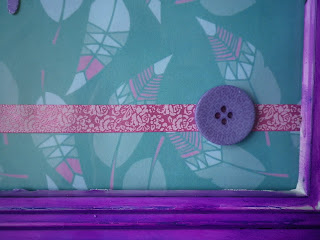
I then glued each decorated bird on the assorted background paper. I also added some extra elements such as stamps, flowers, buttons and leaves to fill up the empty spaces without overloading the page though. I wanted to keep it simple (more in the clean & simple style); the focus should remain on the bird. And after doing that, the birds were ready to be framed!
As I could not find any frame in the colours I wanted, I decided to buy cheap frames and to paint them so they would match the birds designs.
I started sanding each frame to take off the varnish and to prepare it for the painting.
On 4 frames I used a semi-liquid light violet metallic colour (see pictures of violet frames 2,3,7,8). On the 4 others (see pictures of frames 1,4,5,6) I used white gesso as primer coating and then I put Adirondack Alcohol ink - applied with a sponge. On frame 8, I added a stamp design on the edges. And this is what it looks like:
I really enjoyed working on this serie and it did not request a lot of effort. Once you have a clear idea of what you want (I usually start doing some sketches on paper) and which paper to use, it goes pretty quick. You just need to cut, arrange, glue and frame. Moreover you don't need a lot of material. To realise the serie, I used the followings:
- 8"x10" frames - you can buy cheap ones and decorate/customise them (as I did) or buy ready made ones;
- white gesso paint and alcohol ink to decorate your frame;
- patterned papers to use for the backgrounds (I used free samples from Papercrafter magazine);
- various plain coloured papers for the birds - to match or contrast with your patterned papers (any leftovers will do);
- embellishments: buttons, ribbons, flowers... anything you fancy to embellish your design.
The pictures below with details show you how easy it is to obtain nice results with just a few extra elements.
If you have any questions concerning the materials, the techniques or anything else, I'll be happy to get back to you.
Don't hesitate to leave a comment or send a message. Any feedback is welcome.


